[출처 : http://withrobot.tistory.com/143]
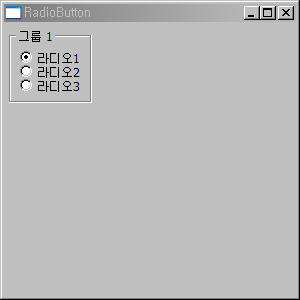
라디오 버튼은 일반적으로 그룹 단위로 배치되기 마련이다. 그룹으로 묶어서 배치하려면 grid를 이용해 나열하고, 이를 하나의 박스로 묶어서 출력해야 한다. 나름대로 꽤 복잡해 진다.
#!/usr/bin/env python
"""11-1b. RadioButton """
# http://withrobot.tistory.com
# 2007.11.27
import wx
class Frame(wx.Frame):
def __init__(self, parent=None, id=-1, title='RadioButton'):
wx.Frame.__init__(self, parent, id, title, size=(300,300), pos=(100,100) )
#wx.Panel.__init__(self, parent, -1)
panel = wx.Panel(self)
#layout controls
vs = wx.BoxSizer(wx.VERTICAL) #수직으로 나열
box1_title = wx.StaticBox(panel,-1,"그룹 1") #그룹 타이틀, 테두리 지정
box1 = wx.StaticBoxSizer(box1_title,wx.VERTICAL) #테두리 설정
grid1 = wx.FlexGridSizer(0,1,0,0) #가로,세로, 간격 지정
radio1 = wx.RadioButton(panel,-1,"라디오1",style=wx.RB_GROUP)
radio2 = wx.RadioButton(panel,-1,"라디오2")
radio3 = wx.RadioButton(panel,-1,"라디오3")
grid1.Add(radio1,0,wx.ALIGN_CENTRE, 5)
grid1.Add(radio2,0,wx.ALIGN_CENTRE, 5)
grid1.Add(radio3,0,wx.ALIGN_CENTRE, 5)
box1.Add(grid1,0,wx.ALIGN_CENTRE|wx.ALL,5)
vs.Add(box1, 0, wx.ALL, 5)
panel.SetSizer(vs)
vs.Fit(panel)
class App(wx.App):
def OnInit(self):
self.frame = Frame()
self.frame.Show()
return True
def main():
app = App()
app.MainLoop()
if __name__ == '__main__':
main()
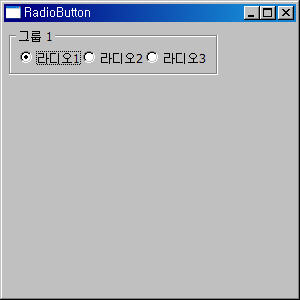
자, 여기서 FlexGridSizer 값을 변경 시키면 배열을 원하는대로 할 수 있다.
버튼을 가로로 나열해 보자.
grid1 = wx.FlexGridSizer(1,0,0,0) #가로,세로, 간격 지정
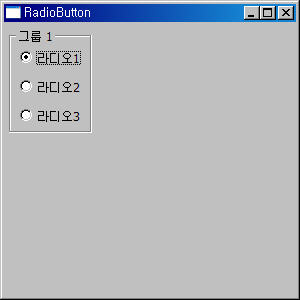
간격값을 증가시키면 라디오 버튼간의 간격도 조절할 수 있다.
grid1 = wx.FlexGridSizer(0,1,15,0) #가로,세로, 간격 지정
#!/usr/bin/env python
"""11-1b. RadioButton """
# http://withrobot.tistory.com
# 2007.11.27
import wx
class Frame(wx.Frame):
def __init__(self, parent=None, id=-1, title='RadioButton'):
wx.Frame.__init__(self, parent, id, title, size=(300,300), pos=(100,100) )
#wx.Panel.__init__(self, parent, -1)
panel = wx.Panel(self)
#layout controls
vs = wx.BoxSizer(wx.VERTICAL) #수직으로 나열
box1_title = wx.StaticBox(panel,-1,"그룹 1") #그룹 타이틀, 테두리 지정
box1 = wx.StaticBoxSizer(box1_title,wx.VERTICAL) #테두리 설정
grid1 = wx.FlexGridSizer(0,1,0,0) #가로,세로, 간격 지정
radio1 = wx.RadioButton(panel,-1,"라디오1",style=wx.RB_GROUP)
radio2 = wx.RadioButton(panel,-1,"라디오2")
radio3 = wx.RadioButton(panel,-1,"라디오3")
grid1.Add(radio1,0,wx.ALIGN_CENTRE, 5)
grid1.Add(radio2,0,wx.ALIGN_CENTRE, 5)
grid1.Add(radio3,0,wx.ALIGN_CENTRE, 5)
box1.Add(grid1,0,wx.ALIGN_CENTRE|wx.ALL,5)
vs.Add(box1, 0, wx.ALL, 5)
panel.SetSizer(vs)
vs.Fit(panel)
class App(wx.App):
def OnInit(self):
self.frame = Frame()
self.frame.Show()
return True
def main():
app = App()
app.MainLoop()
if __name__ == '__main__':
main()
자, 여기서 FlexGridSizer 값을 변경 시키면 배열을 원하는대로 할 수 있다.
버튼을 가로로 나열해 보자.
grid1 = wx.FlexGridSizer(1,0,0,0) #가로,세로, 간격 지정
간격값을 증가시키면 라디오 버튼간의 간격도 조절할 수 있다.
grid1 = wx.FlexGridSizer(0,1,15,0) #가로,세로, 간격 지정